Splicing Tips
Do your splices have an audible "pop" in the sound? How about early splice failure? Try these tips.
The following are two basic tips for making a better splice. The first is a slight modification to the splicer itself and the second is a different approach to actually splicing.
Note: we will be using the Neumade model 35SS splicer for our demonstration and the following tips are assuming the splicer is in good working order. Please enlarge your browser's window to fill the entire screen to properly view these pictures.
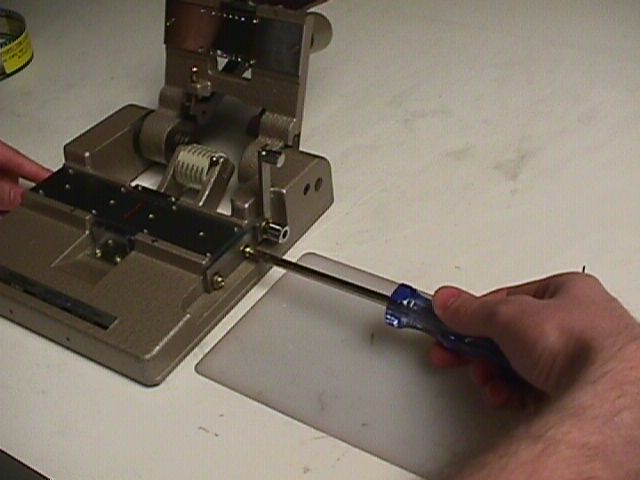

The basic idea behind the splicer modification is to realign the cutter blade. First, remove the two screws holding this cutter assembly onto the splicer as shown above.
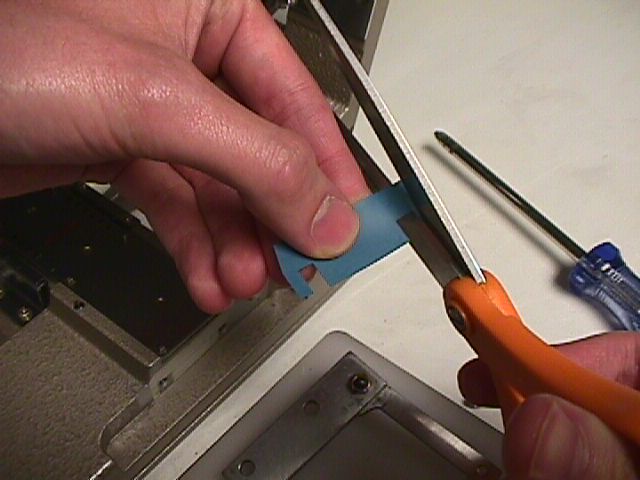
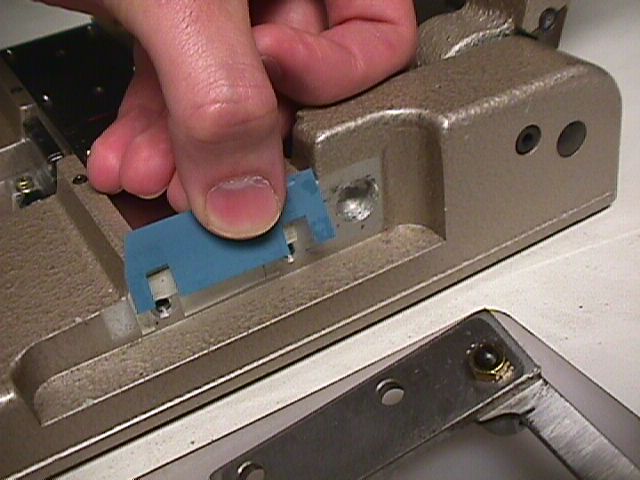
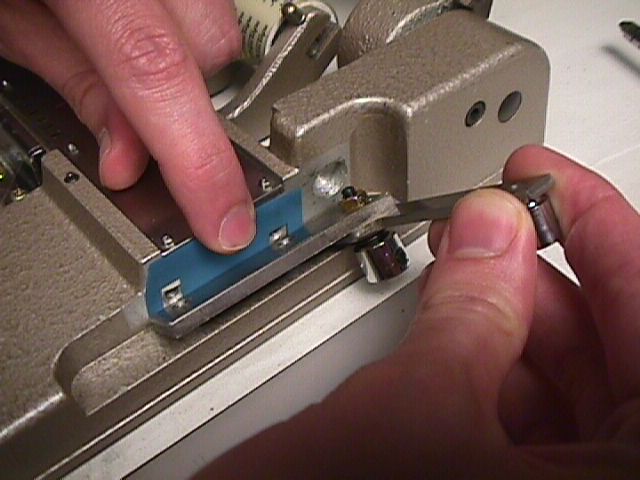
Second, cut a piece of paper, junk film, post-it notes, or whatever you have around and install as shown above. This will act as a shim to position the cutter assembly ever so slightly right of center. (Note: typically one or two layers of film works nicely. In our example above we have cut a small shim out of blue painted leader.) Once you have satisfactorally cut the shim to allow for the remounting of the cutter assembly by leaving two open slots for the screws as well as making sure it doesn't stick up over the surface of the alignment plate, reinstall the cutter blade assembly. You should not be able to see this shim once the cutter blade has been reinstalled.

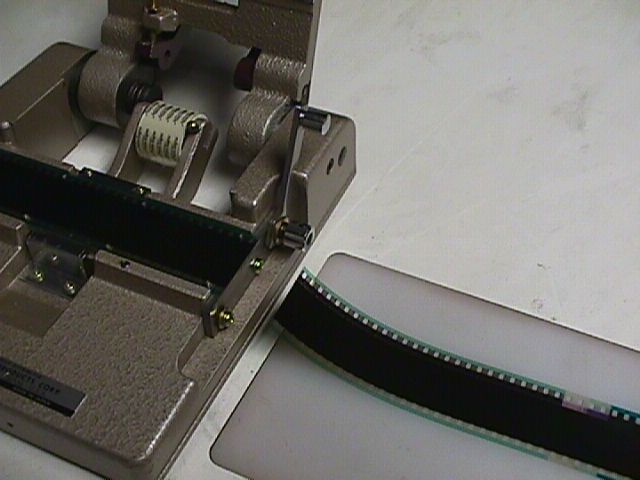
Now it is time to make a test splice. Make your cut as you always would, being careful not to get your fingers on the picture area of the film...(We do not recommend gloves, as they are hard to work with and commonly leave cotton residue on the edges of the splicing tape which in turn shows on screen.)...but make SURE the end of the film to be discarded hangs off the right edge of the splicer. Do this for BOTH cuts. Since we have realigned the cutter blade ever so slightly to the right of center, your cuts will now have a very tiny overlap to them, ideally about 1/2 to 3/4 of the thickness of a compact disc if you will be working mainly with polyestar base film. If you will be working with mostly older repertory films on triacetate film stock, we recommend the overlap to be about 1 to 1 1/4 thickness of a compact disc.
Again, make sure that on BOTH cuts, the part of the film to be discarded hangs off the RIGHT edge of the splicer.

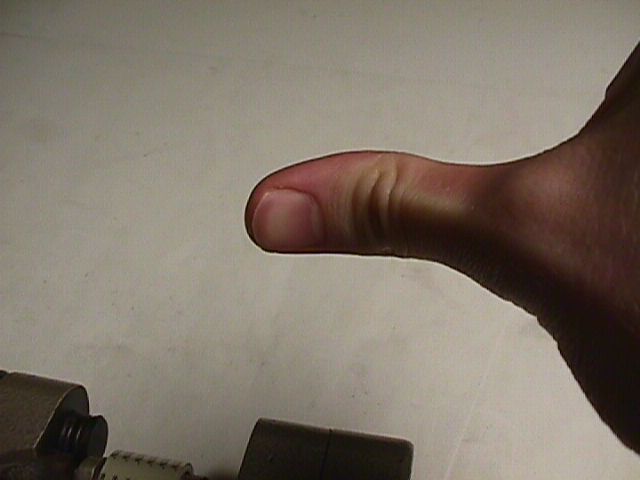
In the pictures above note the curvature of the thumb. Rotate your own thumb until you find the natural flat spot as shown in the second picture on the right. This is the angle you should use for splicing to ensure a good splice with no air bubbles.
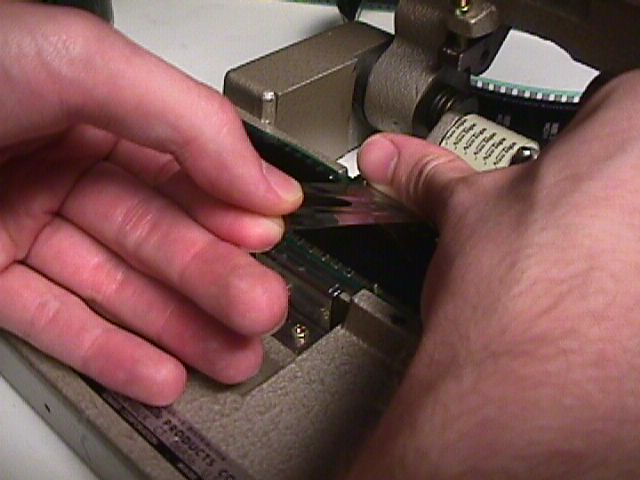
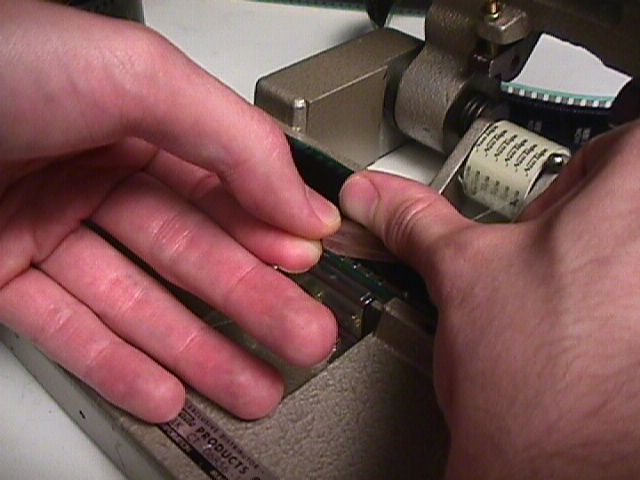
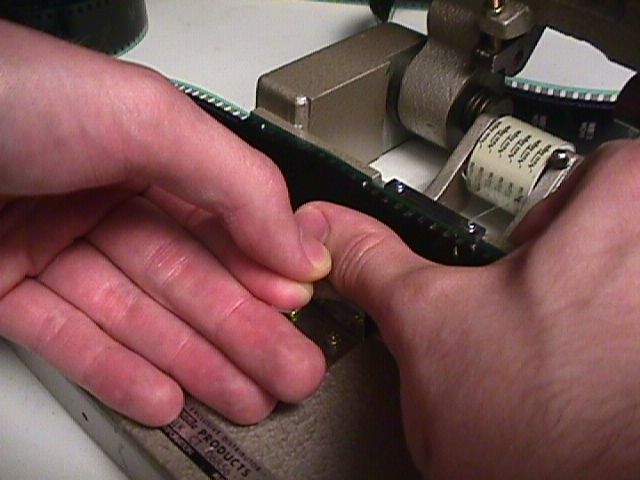
Using your left hand, thumb and first finger, hold the tape directly upward from the roll of tape. Make sure you hold this position with your left hand for the entire duration of the tape application. Then with your right hand rotated to the flat spot of your thumb, start at the edge of the film closest to the tape roll and wipe your thumb across the surface of the tape until you reach the opposite edge of the film. This method will 100% eliminate any and all air bubbles from collecting under the tape during application. Should your thumb not be quite wide enough to cover the entire width of the tape, simply run your thumb down the center of the tape and then smooth out the edges by wiping from center outward.

Finally, punch the splice to perforate the tape and trim the edges. Now, repeat for the other side.

Your finished splice should look like this.
Note: the tape has been positioned so the edges run between the sprocket holes and not through them. The reason for this is durability. When the splicing tape is drawn directly straight from the roll, it will typically half perforate the sprocket holes on both edges of the film. That splice is more prone to its edges wearing off (typically from pad rollers) due to the smaller amount of surface adhesion.
Also, we have used a Dolby tone loop for our example as the clear areas of the flim make it easier to see the overlap.
If you need parts for your Neumade 35SS splicer click here.
One final tip, when ordering splicing tape (we highly recommend Neumade tape over all others) be sure and order it by the sleeve. For example, Neumade ships their tape in sleeves of 8 rolls...thus, you should order 8 rolls at a time so you will get an unbroken sleeve of tape directly from the manufacturer. When you get this at your theater, do NOT open it and take the rolls out. Take them out one by one as you need them and keep the rest in the wrapper. Taking the rolls of tape out and setting the rolls on their sides will guarantee the edges to collect dust and dirt before you ever even load it onto the splicer. That is what causes the tiny black horizontal lines at the splices. It is dirt from the edge of splicing tape that has been stored in this manner.
This quick modification to the splicer will not affect normal splicer operation for others who may work in the booth with firmly implanted "old school" habits, but will greatly improve the open minded operator's splicing ability.
Oh yeah, you can forget blooping the splices from now on!